

How To Draw Mike From Monsters Inc Step By Step
Krystal enjoys drawing in her gratuitous time. She also loves to give easy tutorials on cute drawings.
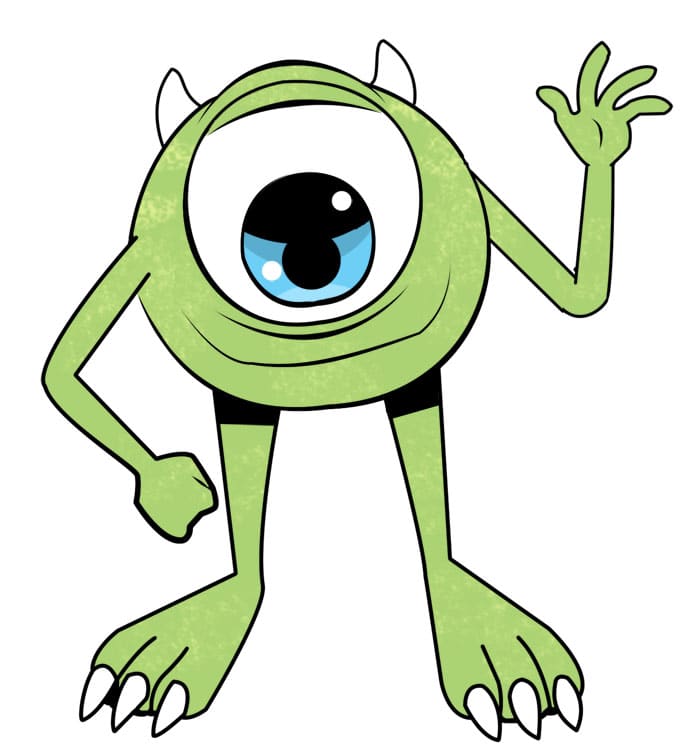
Draw Mike Wazowski from "Monsters University"!
Larn How to Draw Mike From Monsters Inc. and Monsters University
I thought it would exist fun to describe one of the lead monsters from Monsters, Inc. and Monsters Academy, Mike Wazowski! Mike is Sully'due south short, ane-eyed best friend who boasts a big personality. I'1000 sure you'll have a lot of fun drawing him!

Pace i. Draw a large circle that will become the body.
Stride 1. Describe a Big Circle
Begin the cartoon with a big circle for Mike's torso. Equally you depict this, keep in mind the space needed for the placement of his eye and oral fissure.

Step two. Describe a smaller circle within the larger circle (his eye).
Pace two. Depict Mike's Eye
I usually save features for last, but since Mike's eye is such a major office his overall look, nosotros'll depict information technology now. However, we'll relieve the pupil and the other more detailed facets of the center for later.
On the inside of the circumvolve starting near the top, depict the eye. Leave just a very modest amount of space betwixt the top of the centre and the body as you lot meet pictured in the case.
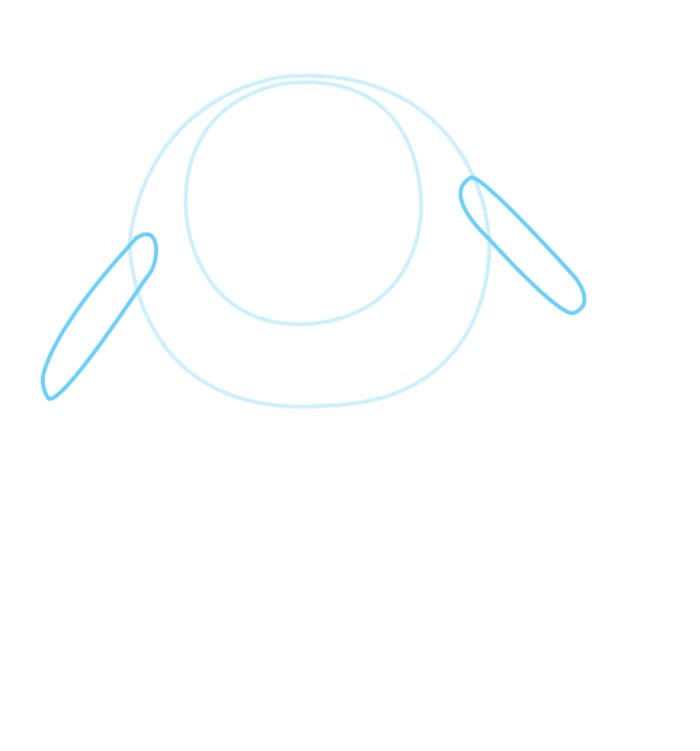
Step three. Brainstorm cartoon the arms.
Step 3. Commencement the Arms
Begin drawing the arms now, starting with the base of operations of the arms. Draw one long oval on each side of the body. Describe them shut to the midpoint of the body. Be careful not to identify them also loftier up on the body or too low on the body. Placing them too high will make information technology look similar Mike has ears. Place them as well low, and you will requite him an unusual extra pair of legs!
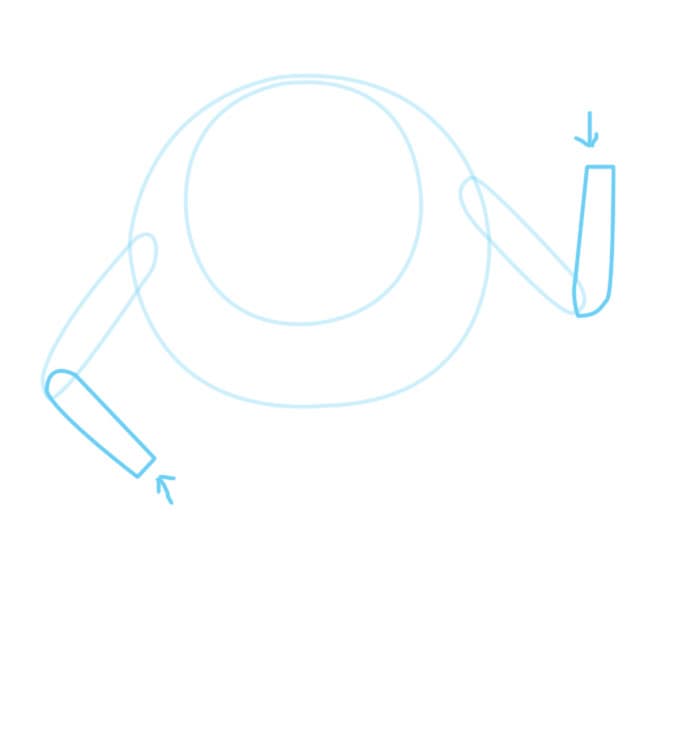
Step 4. Draw the forearms. Leave the ends of the forearms flat as indicated by the arrows in this example.
Step 4. Draw Mike's Forearms
Now for Mike'south forearms—in the base of operations of each arm (there volition be a bit of an overlap), draw some other long oval for the forearm. Go out the ends of the forearms flat where the wrist meets the hand.

Step 5. Depict in the hands.
Step 5. Add the Hands
Okay, now you lot'll add the easily. You'll draw the left hand (the ane balled up) outset.
This manus is simple. All yous need to practise is depict a circumvolve on the apartment portion of the left forearm. Since the fist is clenched, the fingers volition not exist visible. However, you tin point the knuckles by drawing 2 small bumps. You can do this now or subsequently on when we tackle adding in the fine details. If you exercise wish to add them now, Simply reference the finished drawing at the first of this guide.
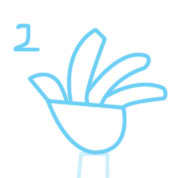
Draw the second hand.
Coil to Continue
Read More From Feltmagnet
Unlike manus one, paw two isn't balled into a fist. Instead, information technology's upwardly and open in a friendly wave that conspicuously displays the fingers. This is the very reason why I chose to divide this step into sub-steps.
Just every bit with paw one, you're going to describe a shape that connects hand two to the apartment tip of the right forearm. However, only draw a half-circle shape since the remainder of the mitt is open. Now, on top of the half-circumvolve draw four oval/rectangle-like shapes for the fingers. Depict them according to what you see in the example on the right.
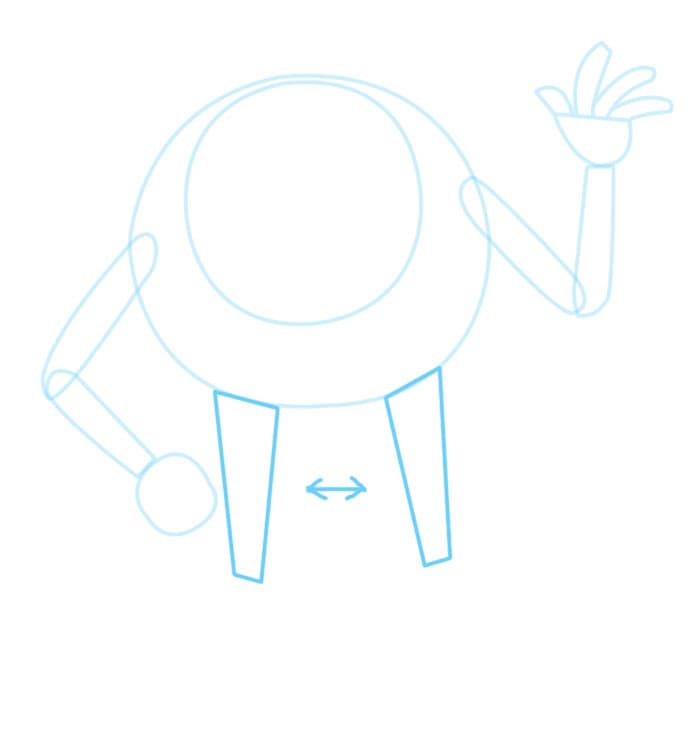
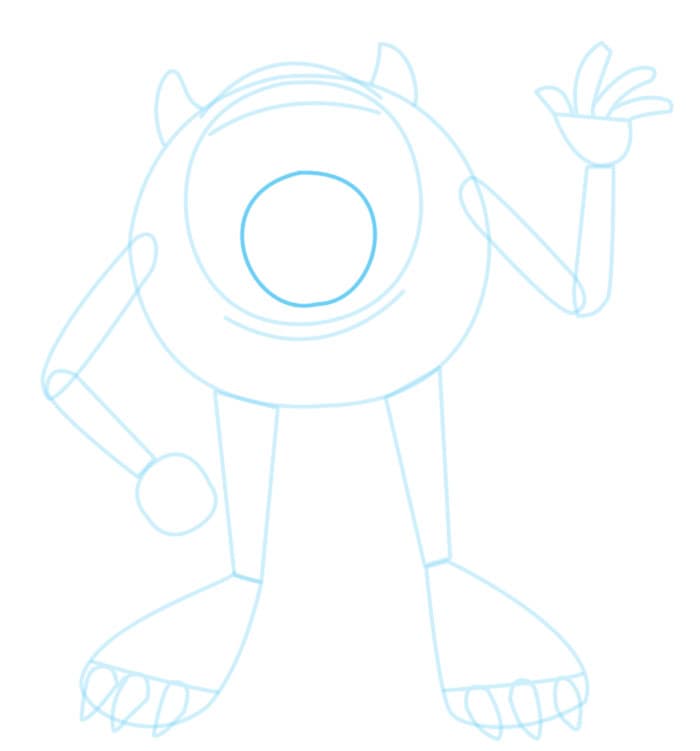
Step 6. Add on the legs. Arrows place where you should draw the legs.
Step 6. Depict the Legs
Now you'll add on the legs. Right underneath Mike'southward torso, depict two long rectangles for the legs. Draw them just most an inch apart. Also, as yous draw the legs, go on them thick at the elevation and have them sparse equally y'all accomplish the lesser where the ankles are.
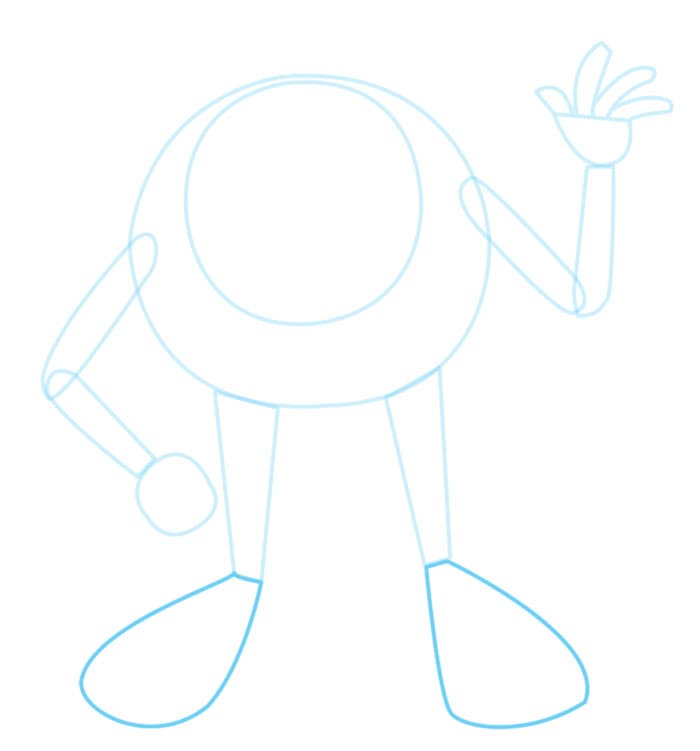
Step 7. Add in the feet.
Stride vii. Draw the Feet
At present attach the anxiety to the bottom of the legs. Draw the shapes seen in the instance picture.
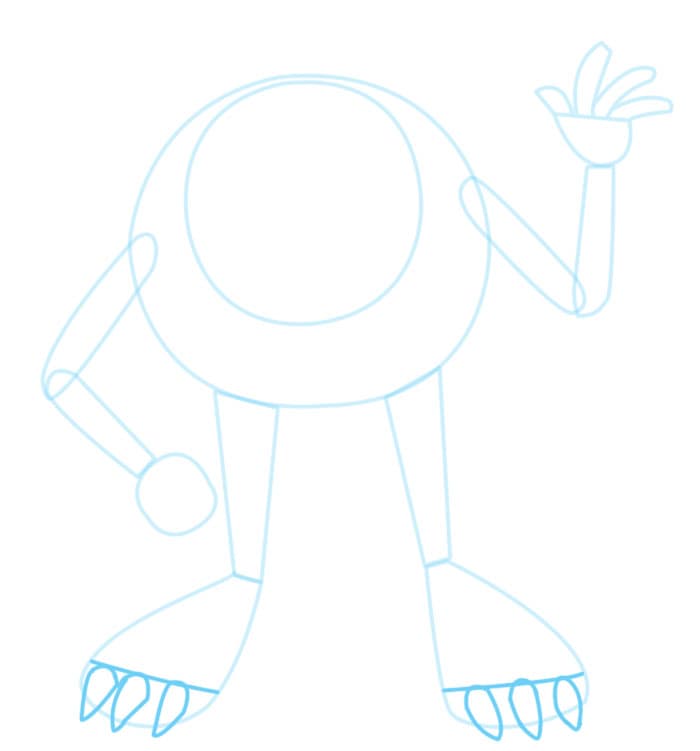
Step 8. Describe three triangles to brand the claws.
Stride 8. Draw the Claws
Role of what makes a monster truly monstrous are their claws. Describe three small-scale (but not too pocket-sized) triangles within each foot. Allow the points of the claws overlap the bottom line of each foot just a scrap. I added an extra line inside each foot to give you a better thought of where the claws become.

Stride 9. Draw rounded triangles to make the horns.
Step nine. Draw the Horns
On top of the caput, depict the rounded triangles that will be the horns. At that place should exist one horn drawn to the left of the eye and another horn but to the right of the eye.
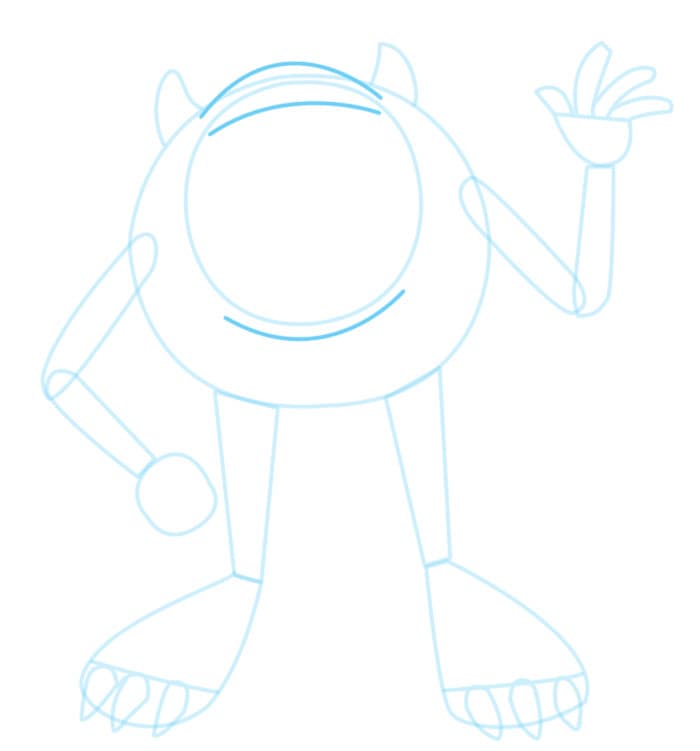
Footstep ten. Begin filling in the features.
Step ten. Draw the Features
We'll get into the features now, starting with the eye. To a higher place and below the heart, draw a curved line. These lines point the eyelids. The line above the eye should ascent to extend only outside the acme of the body.
Inside the heart itself, draw the actual upper eyelid. The sides of the eyelid volition just about bear on the left and right sides of the eye.
Step eleven. Fill in the details of the center.
Pace 11. Depict Mike's Center
Draw Mike's educatee. Merely depict another smaller circle within the centre. You can identify the pupil inside of the eye anywhere you wish.
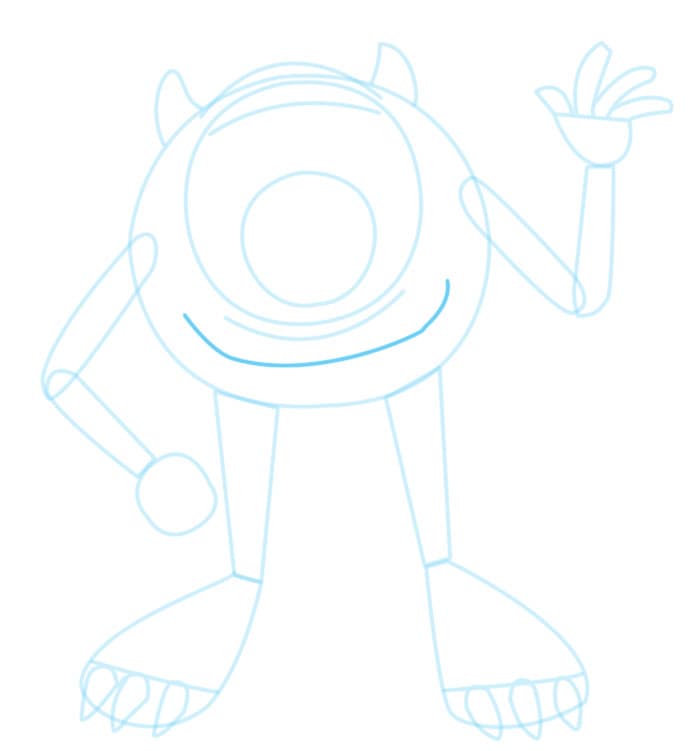
Footstep 12. Fill in the details of Mike's smile.
Pace 12. Draw Mike's Grin
Give Mike a nice big smiling.

Step 13. Finish cartoon Mike's toes.
Pace 13. Draw Mike'south Toes
Draw the lines on the feet for the toes.
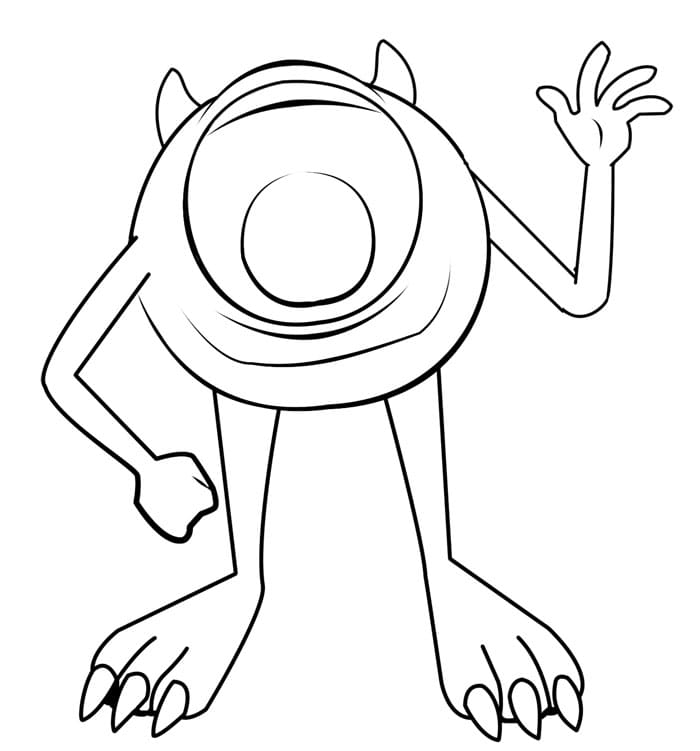
Step 14. Complete the drawing.
Step fourteen. Clean Up the Lines
Complete your drawing by cleaning upward the lines and sketching in any other necessary details.
Cheers for viewing and using this guide. As always, you can ask me any questions you may take: in regards to this guide, drawing techniques, or anything at all that is related to drawing.
Maddox Deemer on December 03, 2019:
Monsters inc is my fav
Epic on April 11, 2019:
Boo is my fav
NickMyller on April 01, 2016:
Dandy Idea! I loved the movies and always wanted to draw some of their monsters, but Mike's beefcake were pretty difficult for me to describe in cool positions.
At present I'g a fiddling bit more comfy with trying information technology, thanks^^
Besides, I heard from a few friends that listening to music would help you to focus on your drawing and relax, is that true? And what kind of music should I listen to?
I can just think about something similar this:
https://www.youtube.com/watch?v=Ih7Y9uQi4BI&in...
Is this okay or doesn't it matter at all?
Kristina Pitts from Greenville, SC, USA on September 07, 2014:
Wow! Yous draw amend than me and I'yard planning on doing some drawing hubs. Did 1 already.
Sulley on June 27, 2013:
Hey guys y'all should draw sulley he is the best
Krystal Dallis (writer) on May 29, 2013:
Thank yous!
Kelly Pittman from South Louisiana on May 29, 2013:
Great Idea for a Hub! So cute. Skillful Job

Source: https://feltmagnet.com/drawing/How-to-Draw-Mike-from-Monsters-Inc
Posted by: twymanthimpard.blogspot.com
0 Response to "How To Draw Mike From Monsters Inc Step By Step"
Post a Comment